How to Read a Console Table Technical Drawing Before You Approve It
A console table technical drawing is the document your factory will build from, so every mark on it matters. This guide shows non-technical owners which callouts to check before signing.
A console table technical drawing is the single document that tells a factory exactly what to build, and your signature on it usually turns an idea into a production order. You do not need an engineering background to review one. You only need to know which marks, numbers and notes to look at, and which questions to ask when something is unclear.
This guide walks you through a typical shop drawing sheet for a wooden console table, in the order you would read it. It is written for hotel owners, developers and procurement managers who must approve drawings but do not draw them every day.
Why the drawing matters more than the render
A render shows mood and proportion. A drawing shows what will actually be cut, joined and finished. Two pieces can look identical in a picture and differ in top thickness, leg section or edge detail, and those differences affect cost, strength and appearance.
Treat shop drawing approval as a contract-level step. Once production starts, a change to a dimension or a material is slow and often expensive.
Step 1: Check the title block first
The title block is the box, usually in the bottom right corner, that identifies the sheet. Many errors are caught here before you read anything else.
- Project and item name: confirm the hotel name, area (for example lobby or corridor) and item code match your furniture schedule.
- Revision number and date: make sure you are approving the latest revision, not an earlier one that was already corrected.
- Scale: a note such as 1:10 means one unit on paper equals ten in reality. Do not measure the paper; read the written dimensions.
- Units: check whether dimensions are in millimetres or inches. We recommend millimetres on the sheet with inches added in brackets when your team works in imperial.
- Quantity: confirm how many pieces this drawing covers and whether left and right versions are needed.
Step 2: Understand the views on the sheet
A console table drawing normally shows several views of the same piece. Each answers a different question.
Front elevation
This is the view from the front. It shows overall length, overall height, leg spacing and the visible proportions of the piece. Check that the height suits the location and that any drawers, shelves or doors sit where you expect.
Side elevation
This shows depth and the profile of the legs and top. It is where you see how far the top overhangs the base and whether the piece is deep enough for its purpose. Depth is critical in corridors and entrance areas, where clearance matters.
Plan view
The plan looks down from above. It shows the shape of the top, corner radii, cut-outs for cables and the position of any back panel or wall notch.
Sections and detail views
Sections are slices through the piece, shown with hatching, and they reveal what is inside: thickness of the top, how the frame is built, where a shelf sits. Detail views are enlarged circles or boxes showing small areas such as an edge profile or a leg-to-top connection. These are the parts that determine quality, so do not skip them.
Step 3: Read the dimensions and what they mean
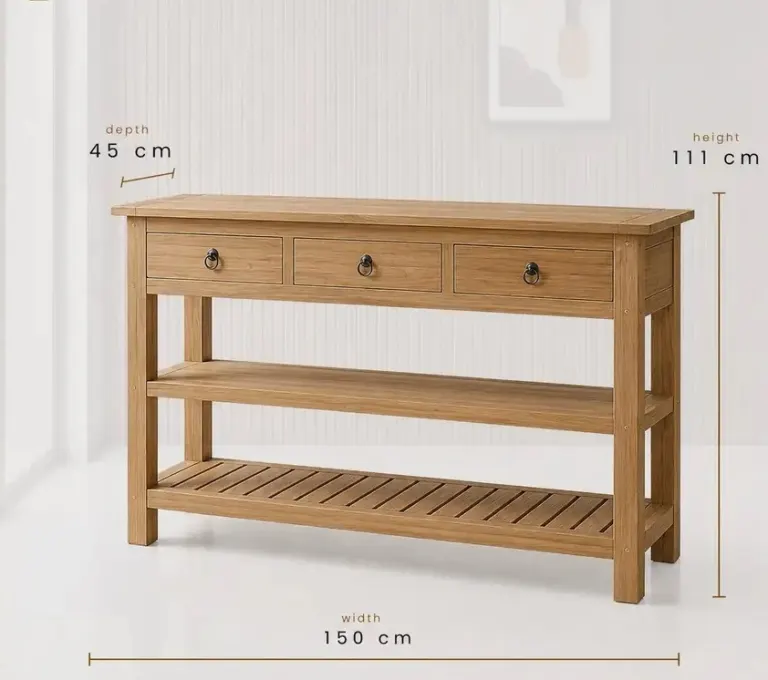
Your furniture dimensions drawing should give three overall measurements: length, depth and height. Beyond those, look for the secondary measurements that are easy to miss.
- Top thickness and any edge thickness shown as a separate figure.
- Leg section (for example 50 x 50 mm (2 x 2 in)) and leg setback from the top edge.
- Height of the underside of any apron or drawer from the floor, important for cleaning and for luggage or cart clearance.
- Internal sizes of drawers, shelves and compartments, if storage is part of the brief.
- Distance from the wall, including any notch for skirting boards.
Check that dimensions add up. If the sections of a length do not total the overall figure, ask the drawing office to correct it before approval.
Tolerances
Look for a general tolerance note, for example a permitted variation of a millimetre or two on timber components. Wood moves with humidity, so zero tolerance is unrealistic. What matters is that the tolerance is stated and that it suits any niche or alcove where the piece must fit.
Step 4: Decode materials and finish callouts
Callouts are the short notes with a leader line pointing at a part. They normally carry a code that links to a material or finish schedule. Check each one against your specification.
| Callout type | What to confirm |
|---|---|
| Timber or veneer | Species, cut or grain direction, and whether the part is solid wood or veneered board |
| Top surface | Wood, stone, glass or laminate, plus thickness |
| Finish code | Colour reference, gloss level (matte, satin or gloss) and coating type |
| Edge treatment | Profile (square, bevelled, rounded) and edge material |
| Hardware | Hinge, runner and handle type, with soft-close if required |
| Metal parts | Material and finish, for example brass or black steel |
If a finish is referred to only by a name such as walnut or espresso, ask for a physical sample or a reference code. Names alone are interpreted differently by different people.
Step 5: Look for joinery and construction notes
A joinery drawing review is about how the piece is held together. You do not need to judge every joint, but you should see that the drawing says something about it.
- How the legs connect to the top or frame, whether by mortise and tenon, dowels or hidden brackets.
- Whether the piece is fixed to the wall and with which fixing points, which affects stability and safety.
- Whether it is delivered fully assembled or knock-down, which changes shipping volume and site labour.
- Any adjustable feet for uneven floors.
Vague notes such as "joined as standard" are a prompt to ask for more detail, especially on heavier pieces with stone tops.
Step 6: Check the symbols and annotations
Small marks carry useful information. A circle with a diameter symbol indicates a round hole, for example a cable grommet. Dashed lines usually show hidden parts, such as a shelf behind a door. A dotted outline may show the wall or an adjacent object for context. Arrows with the letters of a section line tell you where to find the matching section view.
If a symbol is unfamiliar, ask for a legend. A good drawing set includes one, or the drawing office will explain it.
Step 7: Match the drawing to the site
Drawings are only correct if they reflect the building. Before approving, compare the sheet with your architectural plans.
- Measure the niche, alcove or wall length again and compare it with the overall dimensions.
- Check socket and light positions that may sit behind or above the table.
- Confirm corridor widths and clearances required in your location, especially for escape routes and accessibility.
- Think about the route into the building, including lift sizes and door openings.
A short approval checklist
- Title block, revision and quantity are correct.
- Overall length, depth and height match the schedule.
- Secondary dimensions, including top thickness and leg section, are shown.
- Every material and finish callout matches the specification or an approved sample.
- Joinery, fixing and assembly method are described.
- Tolerances and site constraints are checked.
- Any questions are written on the sheet and answered in a new revision.
How to give feedback the factory can use
Mark comments directly on the sheet or in a numbered list that refers to the callout or dimension. Avoid general remarks like "make it more elegant". Say what you want changed, for example "reduce top thickness to 30 mm (1.2 in)", and ask for a revised drawing that shows the change. Approve only the revision that reflects every agreed change.
Conclusion
Reading a console table technical drawing becomes straightforward once you follow the same order each time: title block, views, dimensions, callouts, joinery and site fit. A careful review at this stage protects your budget and your opening schedule.
If you have a design, reference photo or sketch, send it to us with the location and quantity. We will prepare shop drawings for your review and walk you through each point before production begins.
Sıkça Sorulan Sorular
What is a console table technical drawing?
It is a dimensioned drawing, usually with front, side and plan views plus sections and details, that shows how a console table will be built. It lists sizes, materials, finishes and joinery so you and the factory agree on exactly the same product before production starts.
What should I check first on a shop drawing?
Start with the title block: project name, item code, revision number, units and quantity. Then compare the overall length, depth and height with your furniture schedule. Catching a wrong revision or unit at this stage prevents most costly misunderstandings later.
Do I need a sample as well as a drawing?
Yes, in most cases. A drawing defines shape and construction, but it cannot show true colour, grain or surface feel. Approving finish samples alongside the drawing, or a prototype for larger orders, gives you a more complete basis for sign-off.
What tolerances are normal on wooden furniture drawings?
Timber reacts to humidity, so drawings usually state a small permitted variation rather than exact values. The exact figure depends on the piece and the factory. Ask for the tolerance in writing, especially if the table must fit a niche or alcove.
Can I request changes after approving the drawing?
You can, but changes after sign-off may affect cost and lead time, particularly once materials are cut. If a change is needed, ask the factory to issue a new revision and confirm in writing how it affects schedule and price.
Can Palmiye prepare drawings from a photo or sketch?
Yes. We can develop shop drawings from reference photos, sketches, CAD files or PDFs for custom orders. We then send them for your review and revise until every dimension, material and detail is confirmed before production begins.
Every hotel project is different. Send us your drawings or room schedule for a tailored proposal on materials, lead time and shipping.